Feet Pics for Self-Care: A Guide to Foot Spa and Pedicure Photo Sessions
I want you to imagine something with me. Picture yourself at the end of a long, tiring day. Your feet are aching, and all you want to do is kick back and relax. Now, imagine you could turn this moment into a self-care ritual, a chance to pamper yourself and create a collection of beautiful, soothing images in the process. Sounds good, right? That’s exactly what we’re going to do together. We’re going to explore the art of taking feet pics for self-care.
You might be wondering, why feet pics, and honestly what is the psychology behind feet pics? Well, our feet carry us through life, bearing the brunt of our daily activities. They deserve a little love and attention, don’t they? And what better way to show that love than by giving them a spa-like treatment and capturing the process in beautiful photographs?
But here’s the thing. Taking great feet pics for self-care isn’t just about snapping a quick photo while you’re soaking your feet. It’s about creating a mood, setting a scene, and capturing a moment of relaxation and self-care. It’s about showcasing the beauty of self-love and the joy of taking care of oneself.
In this guide, I’m going to walk you through the process, step by step. We’ll start by getting your feet ready for their close-up. We’ll talk about how to set the stage for your foot spa photoshoot. I’ll share tips on how to get your camera ready and how to strike the perfect foot pose. We’ll also cover the process of reviewing and editing your photos to make them look their best. And finally, I’ll give you some ideas on how to share your masterpiece or keep it for keepsake.
I want you to remember that this isn’t just about taking pictures. It’s about taking time for yourself, treating yourself with kindness, and celebrating the simple act of self-care. So, are you ready to join me on this journey? Let’s get started!
Let’s Get Those Feet Ready for Their Close-Up!
Alright, my friend, let’s get down to business. We’re about to turn your feet into the stars of your very own ‘Feet Pics for Self-Care‘ photo session. Exciting, right? But before we get to the fun part, we need to make sure your feet are looking their absolute best.
First things first, let’s give your feet a nice, relaxing soak. You can use a foot spa if you have one, but a simple basin filled with warm water will do just fine. Add some Epsom salt or a foot soak like the Tea Tree Oil Foot Soak from Purely Northwest. It’s packed with essential oils and botanicals that will soften your skin and soothe your aching feet. Let your feet soak for about 15-20 minutes while you sit back and relax.
Next up, it’s time to slough off any dead skin cells and make your feet super smooth. A good foot scrub like the Tree Hut Shea Sugar Scrub can do wonders here. It’s made with organic shea butter and natural oils that will leave your feet feeling soft and rejuvenated. Just remember to be gentle – we’re not trying to sand down a piece of furniture here!
Moisturizing Your Feet
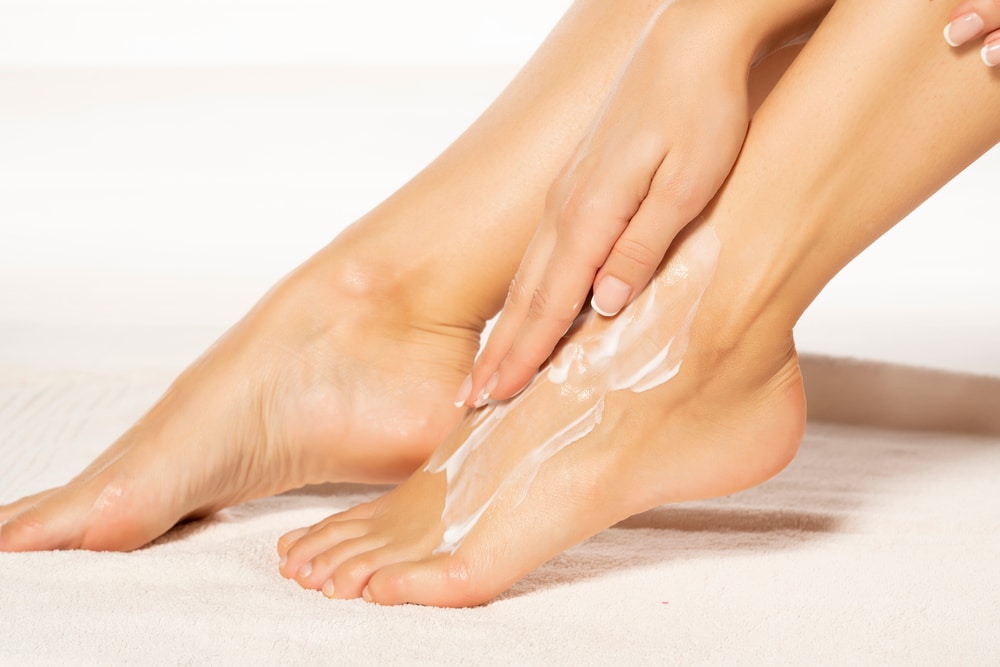

Once you’ve rinsed off the scrub, it’s time to lock in that moisture. A rich foot cream like the Burt’s Bees Coconut Foot Cream will do the trick. It’s made with coconut oil and other natural ingredients that will nourish your skin and make your feet feel like they’re walking on clouds.
Now that your feet are feeling fresh and clean, it’s time to give your toenails some attention. Trim them straight across with a good pair of nail clippers, then use a file to smooth out the edges. The Tweezerman Deluxe Nail Clipper Set is a great option here. It’s got everything you need to keep your toenails looking neat and tidy.
Adding a Pop of Color with Nail Polish
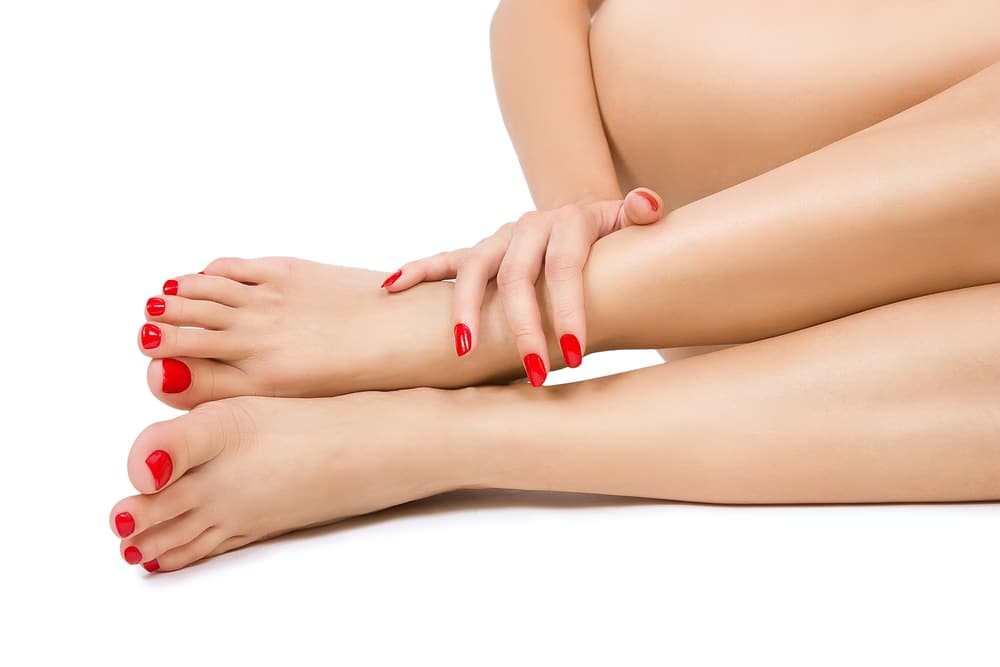
Last but not least, let’s add a pop of color. Choose a nail polish that makes you feel happy and confident. It could be a classic red, a cool blue, or even a sparkly gold – whatever floats your boat. The OPI Nail Lacquer Collections have a wide range of colors to choose from, so you’re sure to find something you love.
Alright, now that your feet are all prepped and ready, it’s time to set the stage for your feet pics for self-care photoshoot. This is where the magic happens, my friend. We’re going to create the perfect environment for your foot spa session, and I’m going to guide you through it step by step.
Choosing the Perfect Location
First things first, we need to pick the perfect location. Now, you might be thinking,
“It’s just a foot photo, does the location really matter?”
The answer is yes, absolutely! The location sets the mood for your photos. It could be a cozy corner of your living room, your bedroom, or even your garden if it’s a nice day out. The key is to choose a place where you feel comfortable and relaxed. After all, this is all about self-care, right?
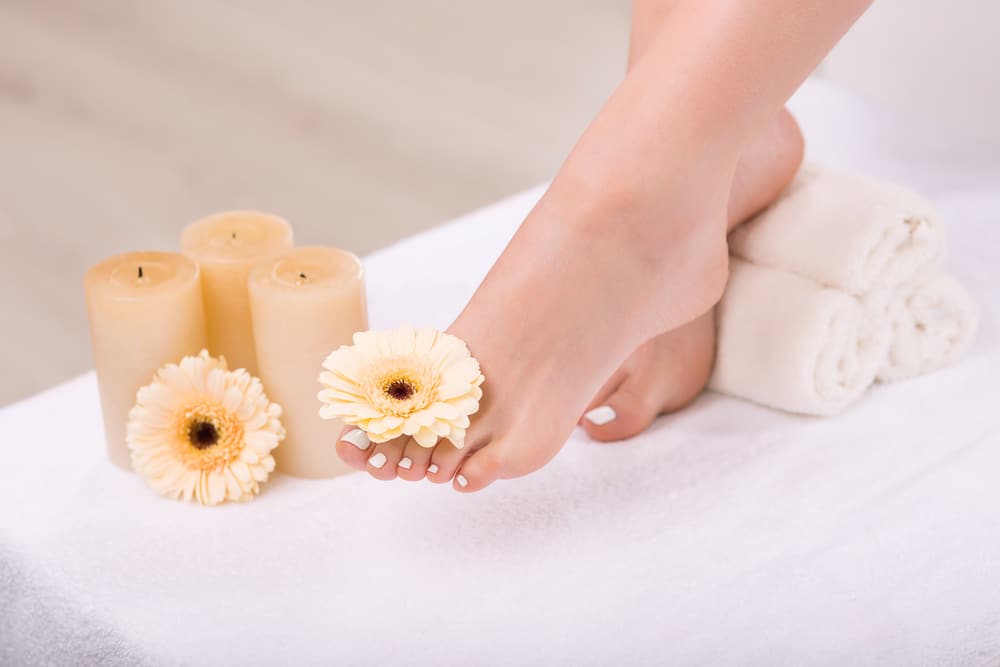
Next up, let’s talk about lighting. Good lighting is crucial for any photoshoot, and your foot spa session is no exception. Natural light is usually the best, so try to set up your photoshoot near a window if you can. If that’s not possible, don’t worry. You can also use lamps or even candles to create a warm, inviting atmosphere. Just make sure your feet are well-lit so all the details can be clearly seen in the photos.
Creating a Clean and Uncluttered Background
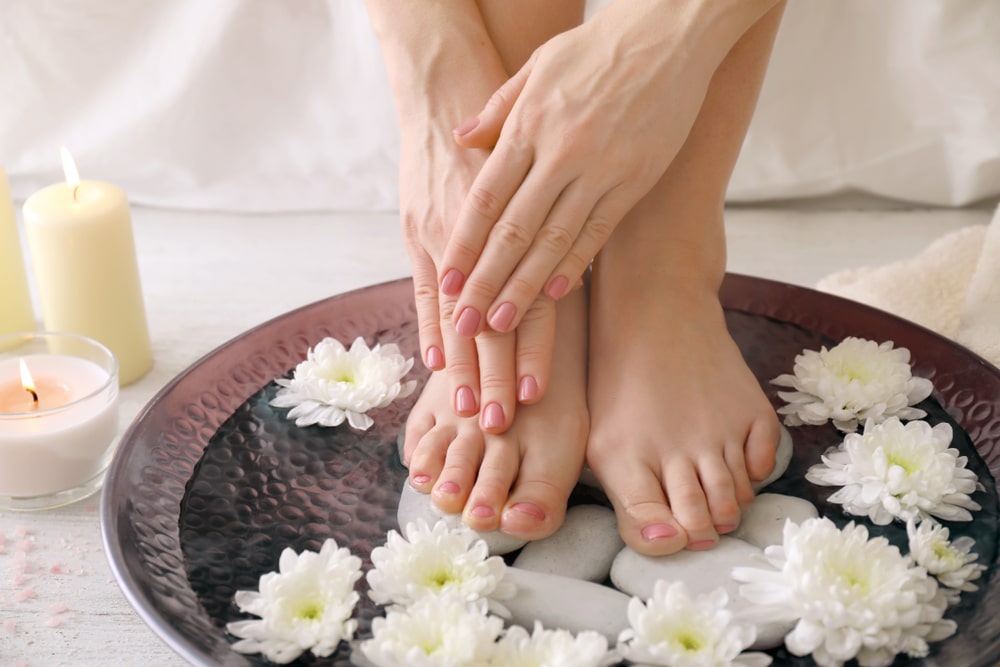
Finally, let’s talk about the background. You want to keep it clean and uncluttered so that the focus is on your beautifully pampered feet. You could use a simple white sheet or a fluffy towel as a backdrop. Or, if you want to get a bit more creative, you could arrange some spa-related items around your feet, like a bottle of foot cream, a scrub, or some pretty flowers. Just remember to keep it simple and not too busy. We don’t want anything to distract from the stars of the show – your feet!
Camera Ready? Let’s Do This!
Alright, we’ve prepped your feet, set the stage, and now it’s time to get your camera ready for your “Feet Pics for Self-Care” photoshoot. This is where we capture the magic, my friend. But don’t worry, you don’t need to be a professional photographer to take great foot pics. I’m going to guide you through it, step by step.
First things first, let’s talk about the camera. Now, you might be thinking,
“Do I need a fancy camera for this?”
The answer is no, not at all! You can use a smartphone or a digital camera, depending on what you have available. Most smartphones these days have pretty good cameras, so that’s a great option. But if you have a digital camera and you’re comfortable using it, go for it! The most important thing is that you’re comfortable with the camera you’re using.
Setting Up Your Camera for the Best Shot
Next up, let’s set up your camera for the best shot. If you’re using a smartphone, make sure it’s set to the highest resolution possible. If you’re using a digital camera, you might want to play around with the settings a bit. Try different modes and see what works best for you. And remember, always clean your camera lens before you start. A dirty lens can make your photos look blurry or smudged, and we don’t want that, do we?
Finally, let’s talk about camera apps and settings. There are tons of camera apps out there that can help you take better photos. Some of them allow you to adjust settings like exposure and focus, which can be really helpful. One app I recommend is VSCO. It’s easy to use and it has a lot of cool features. As for settings, try to keep your camera steady when you’re taking the photos. You might want to use a tripod or rest your camera on a stable surface to avoid shaky shots. And don’t forget to check the lighting before you start. Good lighting can make a huge difference in how your photos turn out.
Strike a Pose: Foot Edition
Alright, my friend, we’ve prepped your feet, set the stage, got your camera ready, and now it’s time for the fun part – striking a pose for your “Feet Pics for Self-Care” photoshoot. This is where you get to be creative and show off your beautifully pampered feet. But don’t worry, you don’t need to be a professional model to do this. I’m going to guide you through it, step by step.
First things first, let’s talk about foot positions. Now, you might be thinking,
“How many ways can I position my feet?”
Well, you’d be surprised! You can point your toes, flex your feet, cross your ankles, or even tuck one foot under the other. The key is to experiment and see what feels comfortable and looks good in the photos. And remember, this is supposed to be a fun and relaxing experience, so don’t stress too much about getting the perfect pose. Just enjoy the process and let your feet do their thing!
Capturing Different Angles and Perspectives
Next up, let’s talk about angles and perspectives. This is where you can really get creative with your “Feet Pics for Self-Care“. Try taking photos from different angles – from above, from the side, or even from below if you’re feeling adventurous. You can also play around with the perspective. Maybe you want to focus on your freshly painted toenails, or perhaps you want to capture the bubbles in your foot spa. The possibilities are endless!
Alright, my friend, we’ve prepped your feet, set the stage, got your camera ready, and even struck a pose. Now it’s time for the main event of your “Feet Pics for Self-Care” photoshoot – the actual snapping of the photos. But don’t worry, you don’t need to be a professional photographer to do this. I’m going to guide you through it, step by step.
Taking Multiple Shots

First things first, let’s talk about taking the photos. Now, you might be thinking,
“How many photos should I take?”
Well, the answer is as many as you want! The key is to take multiple shots. Try different angles, different poses, different lighting. Don’t be afraid to experiment. Remember, this is supposed to be a fun and relaxing experience, so don’t stress too much about getting the perfect shot on the first try. Just enjoy the process and snap away!
Next up, let’s talk about reviewing and selecting your favorite photos. Once you’ve taken a bunch of photos, take some time to go through them and pick out your favorites. Look for photos that capture the mood of your foot spa session, that show off your beautifully pampered feet, and that make you feel good about yourself. Remember, this is all about self-care, so choose photos that make you feel happy and relaxed.
Adding the Final Touches: Feet Pic Editing 101
Hey there! Today, let’s dive into the wonderful world of feet pic editing and learn how to add those final touches to your self-care snapshots. Whether you’re an aspiring foot model or just someone who loves taking pics of your pampered feet, knowing a few tricks to enhance your foot photos can make a world of difference. So grab your favorite foot pic editing app and let’s get started!
Alright, first things first. To edit your feet pics, you’ll need a handy-dandy foot pic editing app on your smartphone or computer. There are plenty of great options out there, ranging from user-friendly to more advanced ones. Popular choices include FootTune, SoleSnap, and ToesTouch, among others. Feel free to explore and find the one that suits your style and preferences.
Once you have your trusty foot pic editing app ready to go, it’s time to start making your feet pics shine!
Adjusting brightness, contrast, and saturation

One of the simplest yet most effective ways to enhance your feet pics is by adjusting the brightness, contrast, and saturation levels. These settings can dramatically alter the mood and overall appeal of your foot photos.
Let’s start with brightness. If your feet pic seems a bit too dim, you can increase the brightness to bring out more details and make it look more vibrant. On the other hand, if the image appears overly bright, you can decrease the brightness to achieve a more balanced and soothing look.
Next up is contrast. Increasing the contrast can make your foot photo pop by enhancing the difference between light and dark areas. This can add depth and make your well-cared-for feet stand out. Conversely, reducing the contrast can create a softer, more relaxing atmosphere.
Lastly, we have saturation. This setting controls the intensity of colors in your feet pic. Boosting the saturation can make your image more lively and eye-catching, perfect for showing off those self-care vibes. If you prefer a more natural and serene look, decreasing the saturation can create a softer and more calming feel.
Remember, when adjusting these settings, it’s important to find the right balance that enhances your feet pic without going overboard. A little tweak can go a long way!
Cropping the pic for the best foot focus
Now that we’ve mastered adjusting the basic settings, let’s move on to cropping. Cropping allows you to remove any unwanted elements in your foot pic and focus on the star of the show—your fabulous feet! It’s like trimming away the excess to reveal the true beauty within.
Imagine you took a fantastic selfie of your feet during a luxurious self-care session, and you want to emphasize those perfect “Feet Pics for Self-Care.” By cropping the image, you can eliminate any distracting background or unnecessary parts of the photo, ensuring that all attention remains on your pampered and cared-for feet.
Most foot pic editing apps provide a cropping tool that allows you to manually select the desired portion of the photo. Simply drag the corners or edges of the cropping box until you have the composition you desire. Don’t forget to consider the rule of thirds, a guideline that suggests placing the main subject off-center to create a more visually pleasing image.
Once you’re satisfied with your crop, go ahead and save your masterpiece! Ta-da! You’ve successfully added the final touches to your feet pic.
Show Off Your Masterpiece or Keep It for Keepsake

Hey, my friend! Now that you’ve perfected your feet pics with some editing magic, it’s time to decide what to do with your masterpieces. Should you show them off to the world on social media, sell them on FeetFinder and other platforms, or keep them as cherished keepsakes for your personal enjoyment? Let’s explore both options and see what suits your feet pics for self-care best!
One popular choice for displaying your feet pics is to share them on social media platforms. Whether you’re an avid Instagram user or prefer Facebook or Twitter, social media offers a fantastic way to showcase your foot photography skills to a wide audience.
Here’s how you can make the most of sharing your feet pics on social media:
- Choose the right platform: Consider which social media platform aligns with your style and where your intended audience is most active. Instagram, with its focus on visuals, is often a top choice for sharing feet pics. However, don’t be afraid to explore other platforms that may offer unique features or cater to specific communities.
- Craft an engaging caption: Captions can add context and personality to your feet pics. Share a little story about your self-care journey, include a relevant quote, or provide tips and tricks for foot care. Engaging captions can spark conversations and attract more attention to your photos.
- Use hashtags: Hashtags are the magic ingredient for discoverability. Research popular foot-related hashtags, such as #FeetPics, #FootCare, or #SelfCare, and include them in your post. This helps interested users find your photos and connect with like-minded individuals.
- Engage with the community: Social media is all about connections. Engage with other users who share similar interests. Leave thoughtful comments, respond to messages, and join conversations. Building a supportive network can bring more visibility to your feet pics for sale and help you discover new ideas and inspiration.
Remember, social media can be a double-edged sword, so always prioritize your privacy and safety. Only share what you’re comfortable with and be mindful of your online presence.
Archiving your photos for personal keepsake

Alternatively, you may choose to keep your feet pics as personal keepsakes. Archiving your photos allows you to create a private collection that you can cherish and revisit whenever you want. Here are some tips for archiving your feet pics:
- Organize and store them securely: Create folders or albums on your computer or smartphone to keep your feet pics organized. You can arrange them by date, theme, or any other system that works for you. Additionally, consider backing up your photos to external hard drives or cloud storage services to ensure they’re safe from accidental loss.
- Create a photo book or collage: Transform your feet pics into a physical keepsake by creating a photo book or collage. There are various online services that allow you to design and order custom-made photo books. You can also print and frame your favorite foot photos to decorate your personal space.
- Reflect on your self-care journey: As you look back at your feet pics, take a moment to reflect on your self-care journey. Appreciate the progress you’ve made, the moments of relaxation and pampering, and the positive impact it has had on your well-being. Your feet pics can serve as a reminder of the importance of self-care and the joy it brings.
- Share selectively: While archiving your feet pics is primarily for personal enjoyment, there may still be moments when you want to share them with close friends or loved ones. Choose trustworthy individuals with whom you feel comfortable sharing these intimate moments.
Conclusion: Embrace Your Feet Pic Journey and Self-Care
And there you have it, my friend! We’ve embarked on an exciting adventure into the realm of feet pic editing and self-care. Why did we write this article? Well, because we believe that taking care of yourself, including your feet, is essential for your overall well-being. Feet pics for self-care can be a fun and creative way to indulge in some personal pampering and celebrate the beauty of your feet.
Why does this article matter? It matters because it’s a reminder that self-care comes in many forms, and capturing moments of relaxation and rejuvenation can be a delightful part of your self-care routine. By learning photo editing techniques and embracing the art of feet photography, you’re able to express your self-care journey visually and share it with others.
So what’s the natural conclusion here? It’s simple—embrace your feet pic journey! Whether you choose to share your masterpieces on social media, creating a community of foot care enthusiasts, or keep them as treasured keepsakes for your personal enjoyment, the choice is yours. Let your creativity shine, pamper those feet, and capture the moments that bring you joy and relaxation.
And now, my friend, it’s time for some fun FAQs to wrap things up:
FAQs (Frequently Asked Foot-Related Questions)
Can I really take feet pics for self-care? Isn’t that a bit unusual?
Absolutely! Self-care comes in many forms, and if feet pics bring you joy and help you unwind, then go for it! Your self-care journey is unique to you.
What if I’m self-conscious about my feet? Can I still take feet pics?
Of course! Feet come in all shapes and sizes, and every pair is beautiful in its own way. Embrace your feet and remember that self-care is about self-love and acceptance.
How can I make my feet pics stand out on social media?
Be creative! Experiment with different angles, lighting, and settings. Show off your personality and unique style. And don’t forget to use hashtags to reach foot enthusiasts around the world.
Can I edit my feet pics if I’m not a professional photographer?
Absolutely! Photo editing apps are designed to be user-friendly, so you don’t need to be a pro to enhance your photos. Just have fun exploring different editing techniques and find what works best for you.
Are there any specific foot-related hashtags I can use on social media?
Definitely! Try using hashtags like #FeetPics, #FootLove, #SelfCareFeet, or get creative and come up with your own unique ones. Hashtags can help connect you with like-minded foot enthusiasts.
How can I make my feet pics more relaxing and serene?
Play with editing settings like brightness, contrast, and saturation to create a soothing ambiance. Soft lighting, natural tones, and a clean composition can help evoke a sense of tranquility.
Can I take feet pics for self-care even if I’m not into social media?
Absolutely! You can still capture and enjoy feet pics as personal keepsakes. Organize them, print them, create photo books, or simply keep them as digital memories to reflect on your self-care journey.
My Go-To Platform for Flings, Affairs, and MILFs
Looking for top-notch flings, affairs, or MILFs? Skip the rest, AdultFriendFinder is the gold standard. Zero bots, zero fakes—just real connections. I've scored big in multiple cities. Sign up now, it's FREE!