Beginner’s Guide to Feet Photography: A Woman’s Perspective

As a woman who’s spent years honing my craft in the niche world of feet photography, I’m excited to share my knowledge and experiences with you. Whether you’re a budding photographer or simply curious, this guide to feet photography will walk you through everything you need to know to get started. From understanding the basics to mastering advanced techniques, and the pros and cons, I’ll cover it all, drawing from my personal journey in the field.
Why Feet Photography?

When I first stumbled into the world of feet photography, I was skeptical. Why focus on feet when there are so many other subjects? But as I delved deeper, I discovered a fascinating realm of textures, shapes, and emotions conveyed through these often-overlooked appendages.
Feet tell stories—they carry us through life, bearing the marks of our journeys. Capturing the essence of a person through their feet can be just as powerful as a portrait of their face. This unique perspective has enriched my photography and altered how I view beauty in everyday life.
Getting Started: Essential Equipment
When I began my journey in feet photography, I learned that while fancy equipment can be nice, it’s not necessary for creating stunning images. Here’s what I consider essential:
- Camera: Any decent digital camera works. A mid-range DSLR or even a good smartphone camera will do.
- Lens: A macro lens is ideal for capturing fine details, but a standard 50mm lens can also produce beautiful results.
- Lighting: Natural light is your best friend, but a ring light or softbox can be invaluable for indoor shoots.
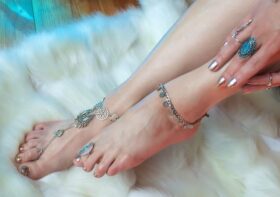
- Props: Simple items like sand, water, or flowers can add interest to your compositions.
- Comfort items: Cushions, blankets, and footstools ensure your subject’s comfort during the shoot.

Setting Up Your Shoot

Location, Location, Location
Choosing the right location is crucial. Whether you’re shooting indoors or outdoors, the background can make or break your photo. Some of my favorite locations include:
- Sandy beaches: Beautiful textures created by the contrast between soft sand and feet.
- Grassy fields: Natural and lush, perfect for a more organic feel.
- Wooden floors: Ideal for indoor shoots, providing a warm, homey atmosphere.
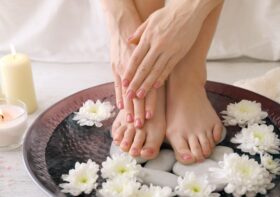
Preparing Your Subject
As a woman photographer, I’ve found that putting my subjects at ease is crucial. Here’s what I do:
- Explain the process: Walk them through what to expect during the shoot.
- Offer a mini pedicure: A little pampering goes a long way in making your subject feel comfortable and confident.
- Discuss boundaries: Establish what your subject is comfortable with and adjust your approach accordingly.
Mastering Composition

The Rule of Thirds
By placing the subject off-center, you can create more dynamic and interesting compositions. Position the feet along the intersecting lines of an imaginary 3×3 grid on your frame to add balance and intrigue to your images.
Playing with Angles
Some of my favorite shots come from unexpected perspectives:
- From above: Showcases the top of the foot and toes.
- From below: Highlights arches and creates interesting silhouettes.
- Side view: Perfect for capturing the curve of the foot.
- Close-up: Reveals intricate details like skin texture and nail beds.
Ethical Considerations

Consent and Boundaries
Always obtain clear, informed consent from your subjects. Discuss how the images will be used and respect their boundaries. If a subject is uncomfortable, adjust your approach or end the session if necessary.
Avoiding Objectification
Feet can be beautiful subjects, but it’s important to approach the art form with respect. Avoid overly sexualized poses unless that’s the agreed intent of the shoot. Your goal is to create art, not objectify.
Building Your Portfolio
As you grow in your feet photography journey, building a strong portfolio is key. Here’s how I approached it:
- Diversity: Include a range of styles, from artistic to commercial.
- Quality over quantity: Choose your best work, not just everything you’ve shot.
- Tell a story: Arrange your images in a way that showcases your growth and style.
- Online presence: Consider creating a dedicated website or Instagram account for your feet photography work.
Conclusion: Beginner’s Guide to Feet Photography

As I reflect on my journey in feet photography, I’m amazed at how much I’ve grown both as an artist and as a person. This niche has taught me to see beauty in unexpected places and to approach my subjects with sensitivity and respect. I hope this guide inspires you to dip your toes into the world of feet photography and enjoy the process of learning and creating.
My Go-To Platform for Flings, Affairs, and MILFs
Looking for top-notch flings, affairs, or MILFs? Skip the rest, AdultFriendFinder is the gold standard. Zero bots, zero fakes—just real connections. I've scored big in multiple cities. Sign up now, it's FREE!